Strategies for embedding geographical enquiry into the GCSE curriculum
Geographical enquiry is a fundamental element of geography and is now firmly established in the geography curriculum, at least on paper, across Key Stages 2-5. There is little or no doubt that students who are involved in geographical enquiry will develop essential skills for learning. However, perhaps more importantly to us, geographical enquiry helps students in constructing geographical knowledge. There is general agreement that this implies an active approach to learning geography which encourages pupils to ask questions about real issues, to search for answers using a wide range of skills and information and to think critically about issues rather than accept the conclusions, research and opinion of others passively. (Davidson, 2006; Naish et al., 2002).
The new GCSE specifications all have an element of geographical enquiry. Take the AQA specification as an example, which assesses the enquiry process in the following ways:
- Questions based on the use of fieldwork materials from an unfamiliar context.
- Questions based on students’ individual enquiry work. For these questions, students will have to identify the titles of their individual enquiries.
In practice, however, opportunities for geographical enquiry are often missed as we plough through the copious content of the new GCSE specifications.
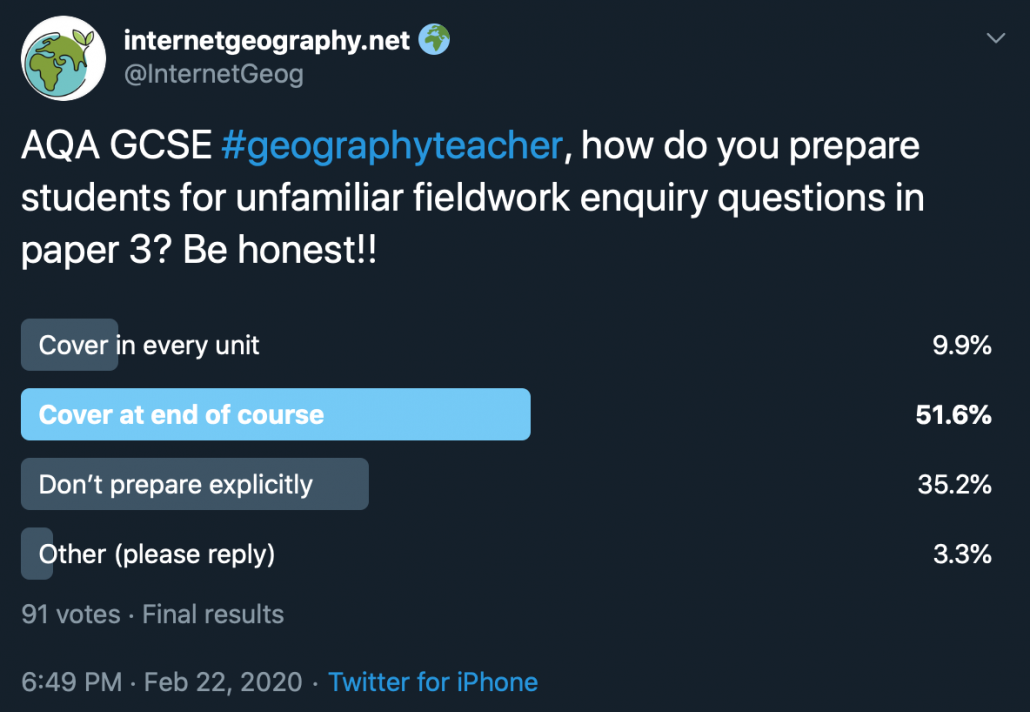
Like many geography teachers across the country, I have been guilty of focussing on the individual enquiry’s students need to complete while paying limited lip service to addressing fieldwork from an unfamiliar context. Having asked geography teachers on Twitter how they prepared students for unfamiliar fieldwork enquiry questions, the results did not surprise me.
It is probably fair to say, even based on this limited sample, geography departments across the country tend to focus on the two compulsory fieldwork investigations but spend little or no time on other aspects of geographical enquiry. Having re-read the AQA GCSE geography examiner’s report for paper three, it is clear that enquiry skills, particularly in the unseen context, is an area for development. Misunderstandings such as the difference between data collection technique and data presentation technique are also highlighted.
In all honesty, and after considerable reflection, I think we are doing both our students and our discipline a disservice if we are not including geographical enquiry throughout the curriculum. However, we face significant challenges in addressing this. Many are finding the increase in the content covered in the new GCSE curriculum a problem to get through. Additionally, an increasing number of schools are reverting to a two-year key stage 4.
Despite these challenges and without ripping up the curriculum and starting again, simple tweaks can be made to the curriculum, our practice and delivery that will allow us to better address geographical enquiry. We should do this not just for the sake of meeting the needs the expectations of the specification but more importantly, to make our students better geographers.
Let’s get tweaking…
In the AQA specification students will be questioned on fieldwork from an unfamiliar context including, but not limited to:
- identifying geographical questions/hypothesis
- identifying risk and strategies for managing this
- identifying appropriate investigation techniques
- identifying appropriate presentation techniques
- completing unfinished data presentation
- describing/explaining data
- completing data analysis (mean, median, mode etc.)
- forming conclusions
There are many opportunities to embed unfamiliar fieldwork throughout the AQA GCSE Geography course, providing students with multiple opportunities to hone their enquiry skills. Students exposed to unfamiliar fieldwork, little and often, are more likely to develop the skills, knowledge and understanding to complete effective fieldwork investigations and improve their enquiry skills.
Most units in the AQA GCSE Geography specification provide opportunities for addressing unfamiliar fieldwork. At an appropriate point within a unit, when students have acquired a strong foundation of subject knowledge, geographical enquiry can be introduced.
So, how might this look in practice?
If the first GCSE unit covered is ecosystems, introduce an unfamiliar fieldwork enquiry by showing your students an image of a deciduous forest ecosystem (once they have studied this aspect of the course). Next, model several examples of geographical questions/hypothesis for this environment, then ask them to develop more. Paired or group work might be appropriate at this stage. You could also address the risks associated with completing fieldwork in this environment and examine risk management along with some basic data presentation and interpretation.
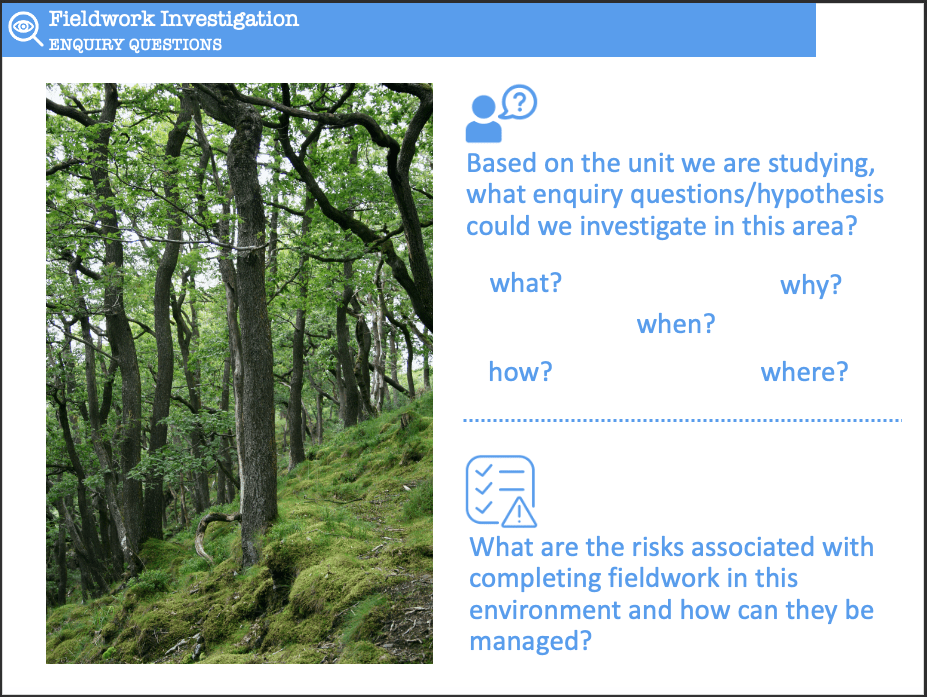
Identify enquiry questions and risks associated with the deciduous forest
In the next unit, present the students with another image and ask them to formulate questions independently, identify risks along with strategies for managing the risk and complete data presentation and interpretation. Next, spend time examining the fieldwork techniques that will support investigating the geographical question(s)/hypothesis. The students can then select appropriate data collection techniques for their enquiry questions/hypothesis (perhaps from a list of methods suitable for the environment) and justify their choice.
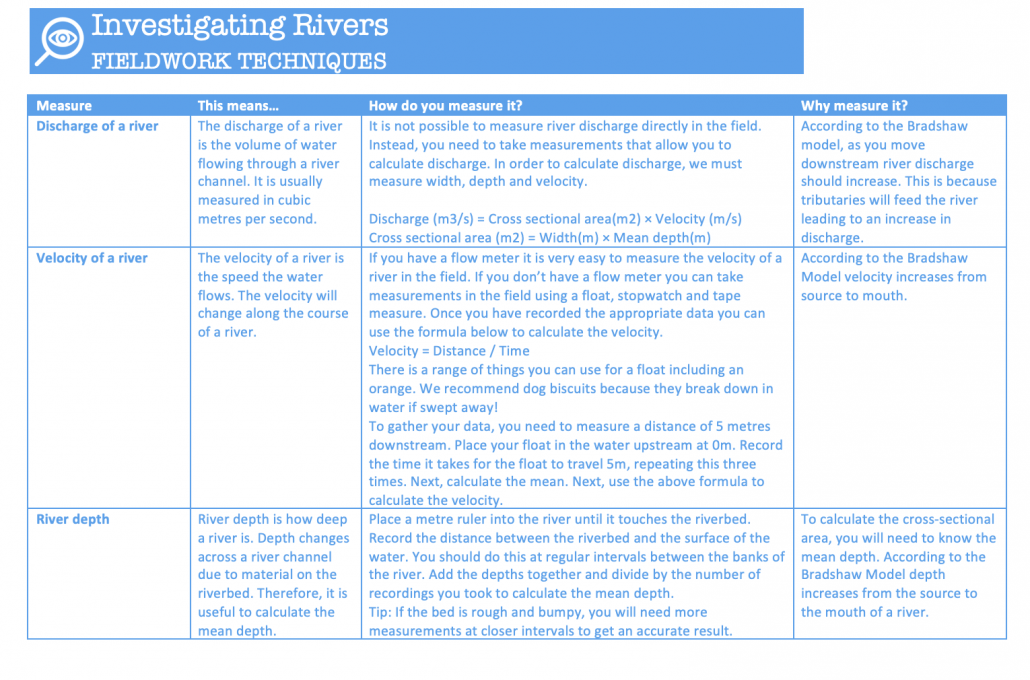
River fieldwork techniques
For homework, they can re-visit their ecosystems enquiry and identify suitable data collection techniques (again, from a list of possible approaches), explaining their choice.
As you move through units, expose your students to further aspects of the enquiry processes, including:
- data presentation
- data processing
- describing, analysing and explaining data
- forming conclusions
- evaluation
In addition to addressing unfamiliar fieldwork in class, assessments should include unfamiliar enquiry questions from the beginning of the course. Start small and build throughout the course.
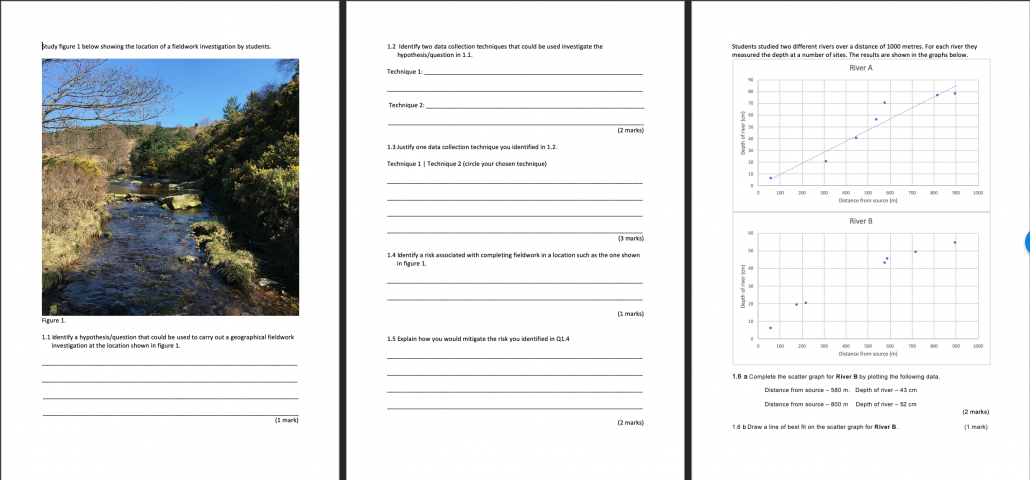
Unfamiliar fieldwork questions – rivers
Below is an outline of resources available to Internet Geography Plus subscribers to support with the enquiry process.
I will be sharing further thoughts on how to embed enquiry in the geography curriculum in future posts.
Comments are welcome below!
Anthony
Internet Geography Plus resources to support with enquiry
To support the above approach, we are developing a range of resources for AQA units that cover fieldwork in unfamiliar contexts. These will include:
• exam questions and mark schemes covering unfamiliar fieldwork contexts
• a PowerPoint resource to support the process of tackling unfamiliar fieldwork contexts in a range of units
• examples of techniques used in a variety of fieldwork investigations
• example fieldwork enquiries
Our first set of resources, available to Internet Geography Plus subscribers include:
- exam questions and mark scheme based on a river enquiry in an unfamiliar context
- a PowerPoint presentation containing images for a range of units that encourage students to consider geographical questions/hypothesis and risk assessments in a variety of environments
- a rivers fieldwork techniques cheat sheet
Did you know? Our Geography Curriculum Tracking Tool allows you to plan for progression in developing enquiry skills. The tracking tool is useful, not just for planning for progression, but is handy if you suffer a ‘deep dive’.
If you have any resources to share in this area, please send them over to [email protected].
Questions based on students’ individual enquiry work
We are currently developing resources to support students in the enquiry process. These guides will take the students through the enquiry sequence and will provide examples of what they need to consider. The A3 resources are fully editable so you can customise them to meet the needs of your students. Each resource pack also contains an overview of the enquiry process and a summary document they can complete at the end of the investigation to support revision.
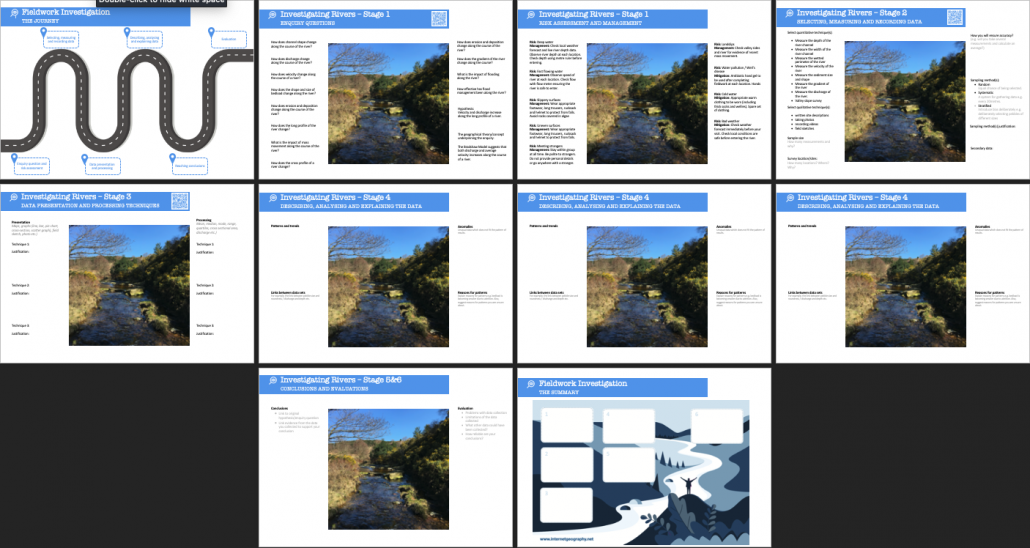
Fieldwork investigation guide – rivers (available to download in the Internet Geography Plus area)
You can download our first draft of a river-based investigation guide and presentation.
These documents will be updated as we build more online guides to support data presentation techniques etc.
Look out for additional resources shortly.
Measuring Air Pollution – A Simple Fieldwork Experiment
In this guest blog post Dr Paul Ganderton provides guidance on completing fieldwork involving measuring air pollution. You can follow Paul on Twitter via @ecogeog.
Fieldwork should be frequent and compulsory! There, said it! Against the mounting paperwork and issues in my system, I stand for practical work for all students as often as possible. However, we do need to be aware of the real constraints in this endeavour. As much as we’d like to spend every lesson out in the field (and imagine how much they’d learn!), we need to allow other subjects their time. Cash is a real issue as well. I’m guessing no-one’s funding has expanded to keep pace with the cost of fieldwork equipment. This is why I’ve developed a series of field experiments that are simple, cheap and effective.
Let’s get started. These are the key factors to I bear in mind at the planning stage:
- Validity – will the fieldwork give me decent data that can be seen (albeit in more sophisticated forms) in real geographical science?;
- Complexity – if the work is done remotely by students, can the instructions be unambiguous so the whole class can be confident everyone’s data are comparable?;
- Timescale – can the work be set up reasonably quickly and get decent results so students keep their enthusiasm? I like the idea of thinking fast and slow and cooking fast and slow, so why not Geography fast and slow! This one’s fast; a week’s trip gives me slow! (Both are valid but I love the quick experiment. It motivates students, gets them to realize that Geography is mostly a practical science);
- Cost – yes, I’d love the latest monitoring equipment (please) but in the real world, you don’t get the luxury and it’s crucial all students take part.
Putting this piece of fieldwork in context of these three ideas:
- This follows accurately the methods used in air pollution research. Today, remote sensors are used but the basic idea of gathering point data is very much alive;
- This experiment has been road tested loads of times. I’ve never had a student fail. I even demonstrate in class first and get them to trial setting up a unit;
- I plan this to last for about 7 days. So, students go home on holiday/half-term, set this up, forget it and bring the materials in at the start of the new term. Total student time – about 1 hour tops. About 3 lessons in class – 1 before to outline the experiment; 2 for analysis and discussion afterwards;
- Cost – borrowing from your science department and a couple of household items means your main cost is just 1 stake per student (woodwork department scrap or hardware store). Depending on your jurisdiction, about 1GBP/$2 all up.
Moving on to the fieldwork stuff:
- Equipment – for each student: 1 stake 1.5m high, ideally 20x20mm square; 4 microscope slides; enough sticky tape to bind top and bottom of the slide to the post; petroleum jelly to smear on each slide. For the analysis, an identification guide and microscope.
- Method:
- Take the stake and tape one slide to one of the faces. Make sure that only about 1cm is covered top and bottom of the slide so there’s enough space for the jelly;
- Repeat for the other 3 faces. It’s important that the slides are all at the top of the stake. I’ve had students tape all four on at once. It’s not hard. If slides are glass, a quick warning about wearing gloves or taking care might be useful. Label each slide as N, S, E or W;
- On the exposed glass (not tape), smear petroleum jelly on the slide. How much? More than a smear, less than a big splodge – I suppose 0.25mm – it needs to be able to withstand a week’s weather;
- Find a spot to locate the stake. The obvious choice is in the garden, away from objects that impede air flow. Some students might live in apartments so they may have only a balcony or even just a window. No problems, just adjust as needed and use this as a case study in discussing sampling arrangements! Make sure the stake is oriented so the North-facing slide faces North etc.
- Leave alone for about 7 days if possible;
- At the end, take the slides carefully off the stake avoiding smudging the jelly. Transport the slides to school so that they are not smeared. I find taping them to a piece of cardboard is good. A lunch box where the slides are stuck to the bottom is excellent. Discuss with students how to transport their data without ruining it!
- Analysis:
- If the work has gone well, you should have 4 slides with a variety of particles embedded in them. From this point, there are two main questions – what are the particles and how many are there?;
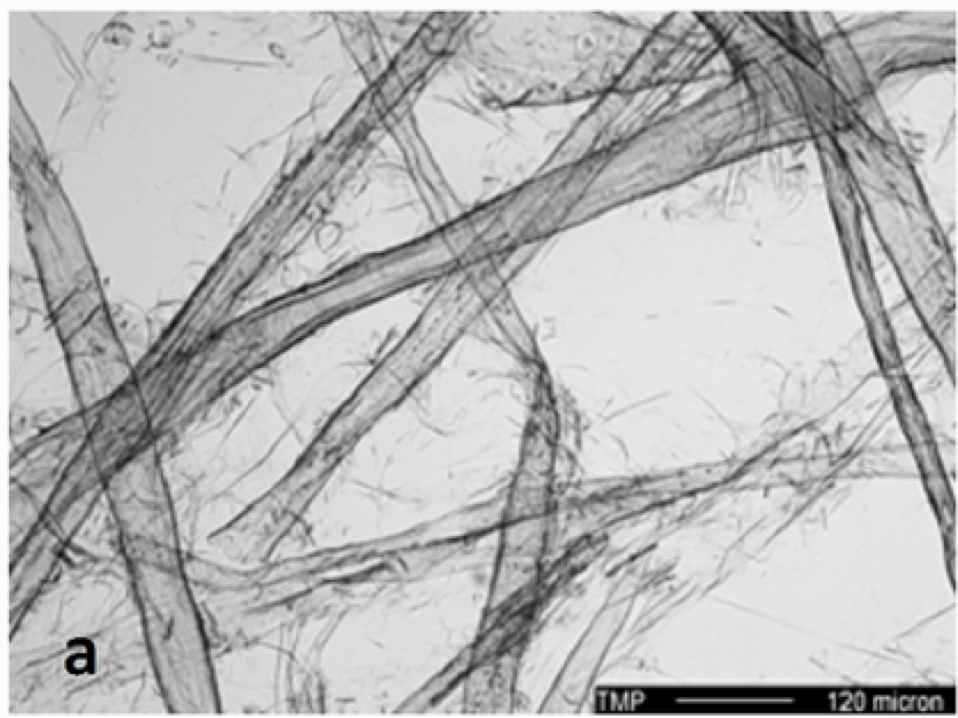
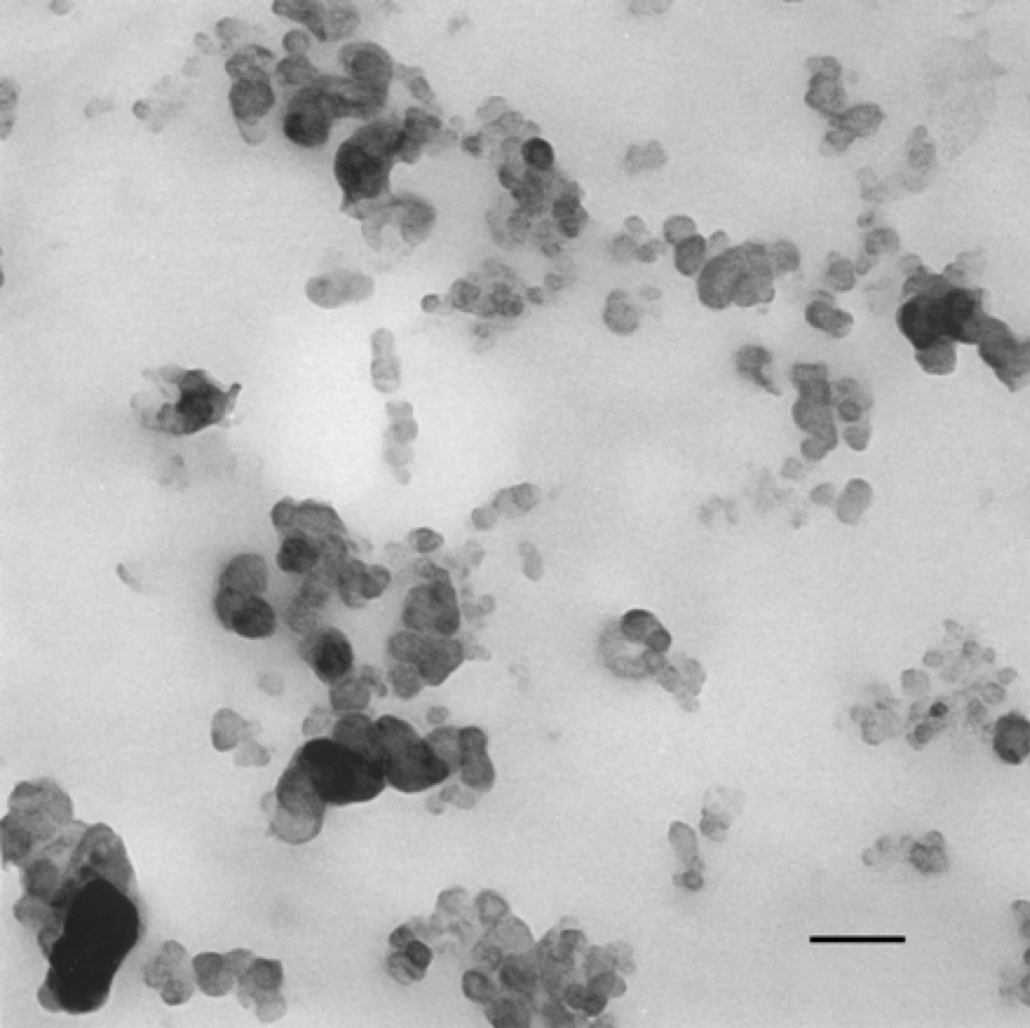
- For the former, there are usually only 5 common particles: pollen, dust, fibres, fly ash, diesel carbon and grit. Give students an identification guide and a microscope and get them to see how many different categories of particle they can recognize(1). Put this in a table/spreadsheet;
- For the latter, there needs to be some common system. It’s possible to count but would take far too long and be likely erroneous (bored students!). A simpler scale is the Likert-type Scale: Absent, Rare, Uncommon, Common, Abundant. Add these labels to the table/spreadsheet;
- Take each slide in turn. Analyse the types of particles and their abundance. Put the data in the table and repeat until slides have been recorded;
- Record the location of each stake on a map (paper or electronic).
- Discussion:
At this stage, you should have 4 readings for each stake and a map detailing locations. This is the pattern – the whatand where. Now we get students to find out why. At this point, you can go in any number of directions which is what makes this such a good piece of fieldwork! Here are just a few of the questions I’ve posed over the years (with suggestions for answers/discussions):
- Which direction has the most particles? (prevailing winds?)
- Which particles are most common? (pollen, suggesting countryside or diesel carbon, suggesting roads?)
- Are particles equally common on all sides or just some? (group of trees on one side?)
- Do particle counts vary in one direction (distance from roads or quarries/forests etc.?)
- Which of these particles causes most impact to (a) the environment (e.g. dust covering plants affecting photosynthesis); and (b) people (poor air quality links to asthma etc.). Get students to research this as a part of their study.
- Taking it further:
The advantage of this work is that you can take it in a number of equally valid directions:
- Critique of method – is it realistic and likely to give decent results?;
- What factors might make the results less valid?;
- What is the sampling method and how might it be improved?;
- What pollutant factors are most important in our towns and cities? Is this research equally useful in other towns/nations? Why/why not?;
- What can be done to reduce air pollution in our town?
- What are the 3 key takeaway points that you have learned? Why did you choose those 3?
- Carry out simple statistical/graphical techniques to allow comparison between sites. What pattern is shown and how can we account for it?
- Air pollution and public health is a huge study area. Students can study the impact of exhaust fumes on health and mental development, explore the issues surrounding Lead in petrol, look at exposure to pollutants on child development etc.
There we have it. A simple yet effective fieldwork item that could be used for different years/topics. It yields itself to so much analysis and interpretation. It develops citizenship and personal health ideas through appreciating the pollution level around us. Given that a bit of promotion never hurt any subject, it can be said that this approach to a topic allows you to develop an appreciation of Geography and its potential in the real world.
Dr Paul Ganderton
@ecogeog
Footnotes
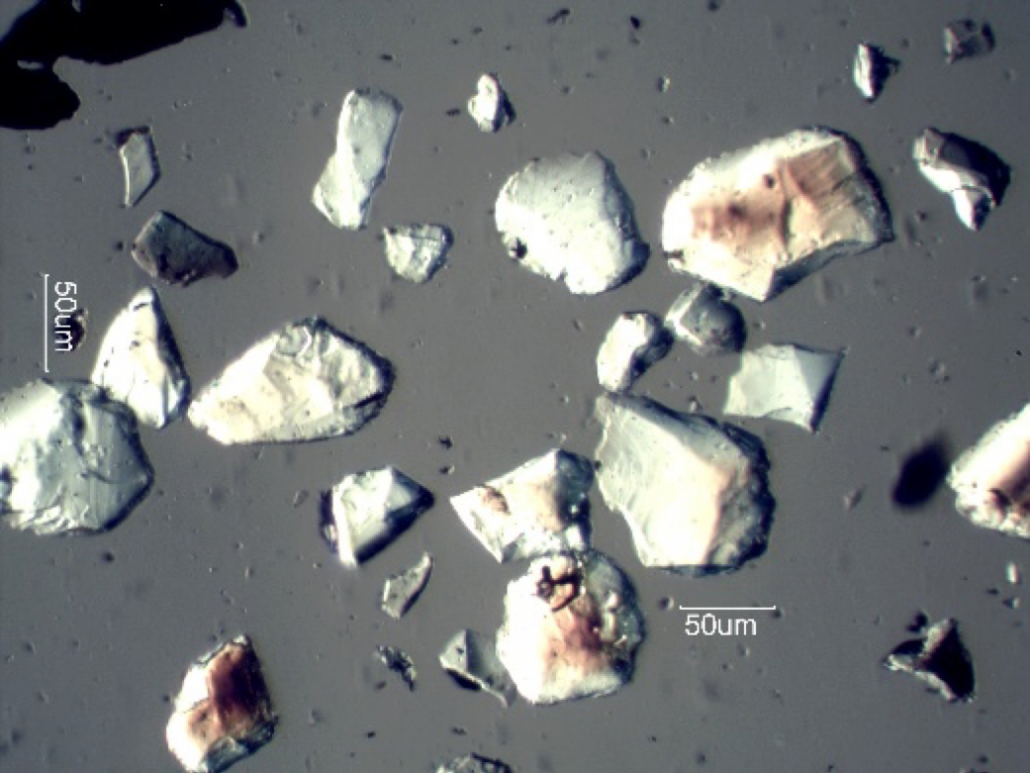
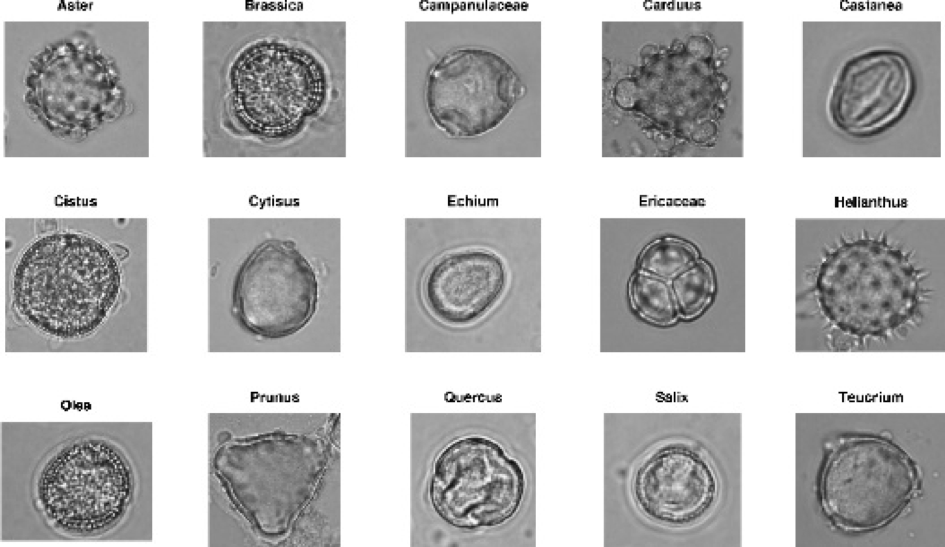
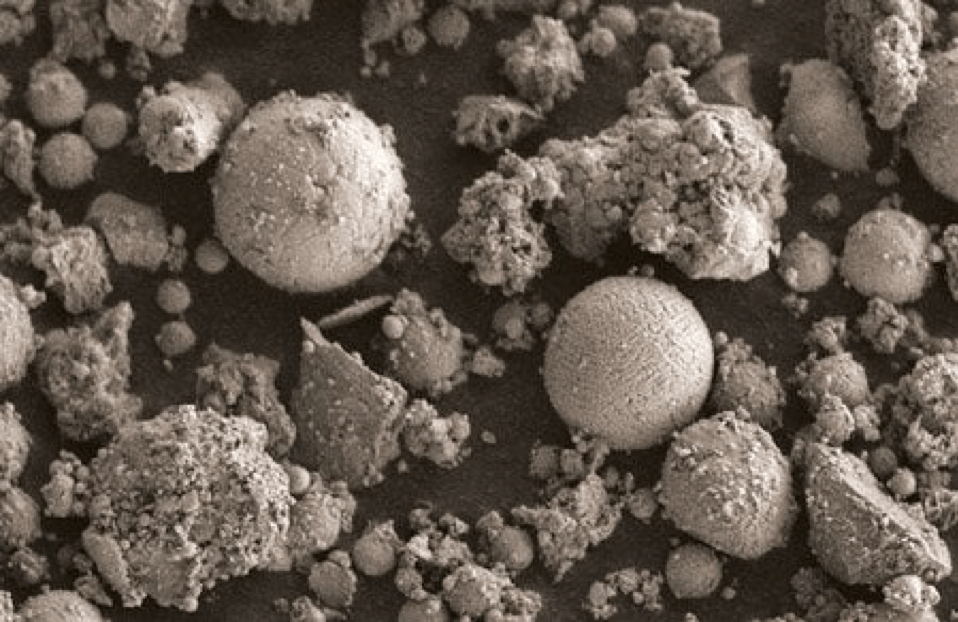
- Particle Identification. It’s easy to make a chart from Google images as was done for this blogpost. Here are some images to help you differentiate:
Pollen:
Dust:
Fibres:
Fly ash:

Diesel/engine particles:
Grit:
